Thursday, November 17, 2016

A Delight-Four Birthday Layout - Week #43

It's Nancy, back again with another fun and easy scrapbook layout! Today I decided to catch up on some old - really old - photos and go all the way back to my daughter's 4th birthday. (Did I mention that my daughter is now a teenager?)
As always, I was able to make this layout in just a few minutes using the layout patterns in the [affiliate link] Scrap Free Scrapbooking eBook by Jennifer Priest. This layout was made using half of a two page design from cutting pattern 3. 


I made some modifications to the pattern to accommodate the photos that I wanted to work with. I printed all of the photos 4" tall to start with, and then trimmed some of the edges so that they fit better across the page. The area occupied by the picture on the right of the layout is open in the cutting pattern but I had another picture that I wanted to use so I filled it with the picture. The other two pictures occupy an area that is supposed to be a single 4" x 6" photo, but I used two photos that are slightly larger than that when put together instead. 

Layering pale colored papers on top of each other, it's hard to get definition and visual separation. To fix this, I used one of my favorite scrapbooking "cheats". I used my Colorbox Pewter Mixed Media ink (I also recommend using a gray Colorbox Fluid Chalk for this technique). I brushed it very lightly along the edges of the paper layers. The color is not obvious to the naked eye, but as you can see below it provides a subtle faux drop shadow that gives the layers more separation. 

I also wanted to get my daughter's age into the title, so I added one of the labels from the "Joy Parade" tags & labels set, and stamped the number on it. This created the pun "delight-four" as my title when I combined it with the puffy word sticker. 
For my journaling, I chose to use a horizontal journaling card. The "It's Your Birthday" heading on it helps establish the birthday theme, and the lined card means I can handwrite without it becoming too big of a disaster. 
All of the patterned paper and embellishments on this layout are from the brand new "Joy Parade" line by Fancy Pants Designs. It's exactly the sort of collection that I love to have in my stash. With designs like balloons, sprinkles, and bright pastels...this collection can create so many themes. When you have versatile things like this in your stash, it makes it so much easier to put together a layout! 

Supplies Used: 
  • Fancy Pants Designs "Joy Parade" patterned paper & embellishments
  • Hero Arts "Essential Uppercase" alphabet stamps
  • Colorbox Fluid Chalk in Blackbird
  • Colorbox Mix'd Media Inkx in Pewter


Tuesday, November 1, 2016

How to Easily Create Custom Scrapbook Paper with Hand Lettering- Week #42


There are times when you are looking for that perfect piece of scrapbook paper and you just can't find it. Making your own patterned paper is an easy solution. You can easily create custom scrapbook paper with hand lettering to fit any occasion. All you need is some cardstock and the perfect pen.


After Deciding on the Right Words or Phrases, Gather a Few Pens and Markers, Then Practice on a Scrap Sheet of Paper.

You can choose a single word, a set of words, a sentence, a quote...anything that would create text to support the theme of your page's story. My scrapbook layout is about my son's 16th birthday. I experimented with a few words and phrases before settling on one that I wanted to use. Try a few different pens with different nibs. You can also experiment with a few different colors to see if more than one color is right for the page. I chose a chisel tip style nib to get the look of hand lettered calligraphy.


*Tip* It helps to start with a color palette in mind when choosing your pen and scrapbook supplies. I used this fabulous color palette from the ClearSnap Color Challenge for October 2016.


Use a Ruler and a Pencil to Draw Guidelines on the Cardstock.

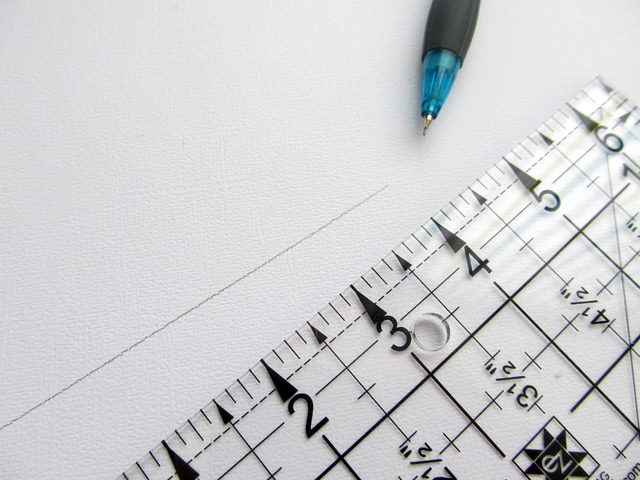
Though any pencil will do, I prefer a mechanical pencil. The lead is very thin and if I don't press hard, it's easy to erase the lines later. Any pencil will work, but it is key to NOT press down hard. The lines should be faint. I chose to write my text on an angle, but you could also write it straight across the page as well. You can also choose to start with a shape and to create hand lettered text using the shape as a guide.


Begin Writing Your Hand Lettered Phrase. Make Sure Some Portions of the Text are Written Off the Edge of the Page.

You want your patterned paper to have an organic feel. The best way to do that is to write your text off the page.  I chose to write the phrase " my son at sixteen". Note how in the line of text above that initial phrase, I began with the word at and then began writing the phrase again. If you look at the finished layout below, you will notice that I repeated this throughout the design, starting my hand lettering at various points within the phrase to add visual interest.

It's also not necessary to hand letter the entire piece of cardstock. Use a scrap sheet or only hand letter the portion of the cardstock you want to use. You can then cut it down and use it within the scrapbook page just as you would any other piece of patterned paper.


Erase the Pencil Guidelines.

Carefully erase the pencil marks. As you can see above, the white eraser helps make those lines virtually non existent. Only lines where I pressed down too hard are slightly visible.

Now you have a custom scrapbook paper with hand lettering and you can create your scrapbook page. I really love using hand lettering this way. Not only does it help you create the perfect paper for your scrapbook story, it also adds a very personal touch to the page in much the same way as handwritten journaling.

If you create your own custom scrapbook paper with hand lettering, we would love to see. Leave a link to your page in the comments section.


Supplies Used
Adhesive-:Xyron
Ink:Clearsnap
Letters: American Crafts
Die Cuts: Project Life- Lucky Charms Collection
Clearsnap Design Adhesives
DecoFoil from ICraft
Pens: Zig Journal and Title in Rose and Black
White Eraser
Mechanical Pencil
Ruler


This scrapbook layout is based on a design from the Scrap Free Scrapbooking Ebook by Jennifer Priest. I had the opportunity to test the book when Jennifer first wrote it. It was so awesome, that I became an affiliate! You can get your copy here.