Friday, February 25, 2011

Layout 7: February 25, 2011

We're back to using scraps this week. I had some leftovers from the layout I made last week and instead of putting them away (where they will collect dust for 5 years) I made another page with them! I know of several people, and I did this myself at one time, who never save scraps. They make something out of everything on the table until it is gone. That's the way to do it! This layout is made in that spirit.


Supplies:
Cutouts Sheet - Cosmo Cricket
Number Stickers for title - American Crafts
Tiny Alpha Stickers - Cosmo Cricket
Cardstock - Bazzill
Brad - American Crafts
Tag - K & Co
Stickers - 7 Gypsies
Chipboard Stickers - Sassafras Lass
Border - Bazzill
 

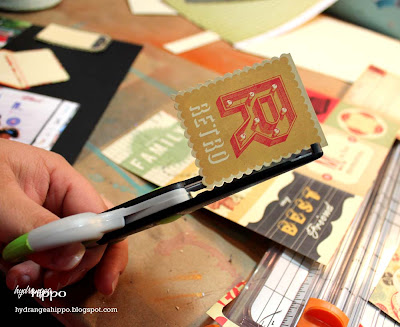
Cut out the tags from the Cutout Sheet using their design as your guide. Why re-invent the wheel, right? For the one tag that had a scalloped edge, I trimmed around it with scalloped edge scissors. It does not matter that the scallops don't match -- they're close enough!


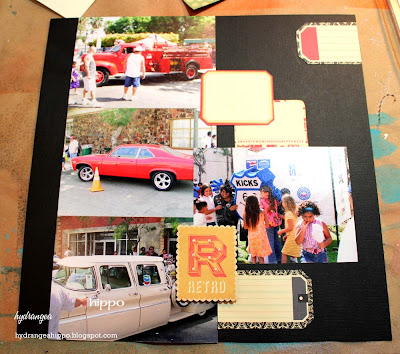
Adhere photos along one side of the Black Cardstock in a column about 1" from the edge. Add one focal photo to the right of that, slightly overlapping two of the photos in the column.


Arrange the tags along the right edge of the photo column. 


Add letters for a title and journaling on the tags. A Pearl Brad in one of the tags is a nice subtle accent.


Add the border to the left side of the photos with a couple Chipboard Stickers. Add label stickers around the page as desired.


That's all for this week -- an easy page, using scraps, in about 15 minutes.

---Jennifer
 

Friday, February 18, 2011

Layout 6: Friday February 18, 2011

This week's layout is all about scraps!! This is a great page to do when you have lots of strips of paper and it can all be done in just about 30 minutes. I also used some old supplies from my stash.

Here's the page, about my daughter's extra large Snoopy:


Supplies:
  • 6x12 Paper Strip
  • 3x12 Paper Strip
  • 7 Gypsies Gaffer's Tape, Book Binding Tape, or other brand of decorative tape
  • 2 Metal Label Holders (7 Gypsies or Lil Davis I think...) with rivets or brads
  • Tiny Alphas (My Little Shoebox)
  • Large Alphas for title (American Crafts)
  • Strip of Paper with Banner printed on it (this is Girl's Paperie I believe)
  • Black Cardstock (Bazzill in Raven)
  • Pinked Circle Punch by Martha Stewart
  • 6x4 Cream Cardstock
  • Smooch Sprtiz in Silver Foil
  • Ribbon by May Arts
  • Background Paper - 7 Gypsies 
One of the things I find challenging on my pages is using themed embellishments. This page is all about Snoopy so it makes sense to use Snoopy themed products on the page.  It's a struggle to create a themed page where the theme does not overwhelm the photos. Just keep it simple. On this page I used a single rub-on to pull the them from the photos and then let the colors in the papers and photos do the rest of the work.


 This layout and next week's feature a bunch of scraps from my stash. I pulled out a few different scraps and made a pile of coordinating pieces, pulling from the pile for boththis week's and next week's pages.


Adhere the strips of paper (3" and 6") across the middle of the background paper. 


Run a length of tape across the top of the page, overlapping the 6" piece of paper. 


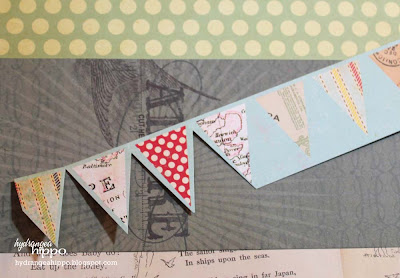
Cut the banner out of the patterned paper. Using 3 D Foam Dots, adhere the banner vertially on the page.


Add the label holders in the upper left corner of the page, on top of the tape.
Fold (but don't crease) th4 4x6 Cream CS in half and cut the corners off to make a tag. 


Spray the tag with Smooch Sprtiz in Silver Foil. 


Add a Black CS circle to tag (punched with Martha Stewart punch) and then add a ribbon bow. Add to the lower right side of page. Add photos, title, and journaling. Insert tiny alpha stickers in the label holders to make a subtitle.


Add a themed rub-on and you're done!

Friday, February 11, 2011

Layout 5: February 11, 2011

If you're like me, you have TONS of double sided paper in your stash. In fact, these days you'd be hard-pressed to find a single sided paper at any store! This is a fun technique when you have only one sheet of a double sided paper and you love both sides.

This week's layout also features scraps, flowers, and buttons for a fun & festive page plus a little Copic marker magic.


Supplies:
Paper - Scenic Route, Dream Street (yes, both out of business. I am really using the stash now!), Sassafras Lass
Flowers - Prima, hydrangeahippo.etsy.com, Daisy D's (another out of biz!)
Buttons, Creative Imaginations, hydrangeahippo.etsy.com
Doily - Martha Stewart (that's new!)
Star Embellie - Heidi Swapp
Cardstock - Bazzill
Twine - hydrangeahippo.etsy.com
Stickers - Jenni Bowlin, Making Memories
Crepe Paper - 99 Cents Only Stores
Cloud Scissors - Fiskars
Ink - Clearsnap, Copic


I cut the double sided paper I wanted to feature down to 10x12. I then folded it down so I could see about 3 inches of the "back" and 4 inches of the "front".


I then used the Cloud Scissors to cut a wave along the shorter piece. You can draw an "S" on the back of the paper if you can't freehand this.


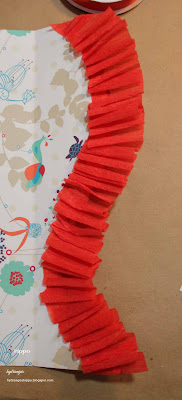
Run tape runner along the back of the scalloped edge. Ruffling as you go, stick crepe paper along the entire length of the scalloped edge.


If the ruffle sticks out unevenly from the edge, trim with scissors. Once the ruffle looks good, apply adhesive to glue that folded end down.


Adhere the Ruffled piece of paper to a 12x12 background. Add a 1x12 strip of coordinating paper to the seam between the folded piece and the background.

Add photos to the page with the photos hanging off the edge of the page. Turn the page over to trim.


Adhere a button the one side of the page with a glue dot. String twine around the button and tuck the ends under the 1x12 border strip to secure them to the page. Tie a bow around the twine strips.


Scatter flowers and embellies on the page and adhere.


Add buttons to the centers of the flowers. For a  more cohesive look, I like to use buttons that are the same color as the flowers.


I added a title with plain black and white Jenni Bowlin sticker letters. They didn't look right so I colored them with some Copic Marker. Easy fix for stickers that don't match!


And that's it--easy peasy page. See you next week!!

Saturday, February 5, 2011

Layout 5: February 4, 2011

After a crazy week at CHA where I took the fewest photos I ever have, I needed some serious scrap therapy! We spent yesterday cleaning my scrap room. And literally I mean WE. Katie helped put so much stuff away for me  - it was amazing! The aftermath from CHA that covered my floor actually FILLED and entire dustpan.

Sadly, there is no layout this week. Come back next week and we'll be back on track :)